

Constraint Layout is a new layout system that allows devs to create perfectly flat (not nested) layouts. Think of it as RelativeLayout on steroids. The developer specifies the position of each component relative to the edges of the other siblings or parent (e.g. the top of this TextView aligns with the bottom of this ImageView) and the layout manager turns those constraints into a linear equations system, solves it and determines the positions of the items in the parent view.
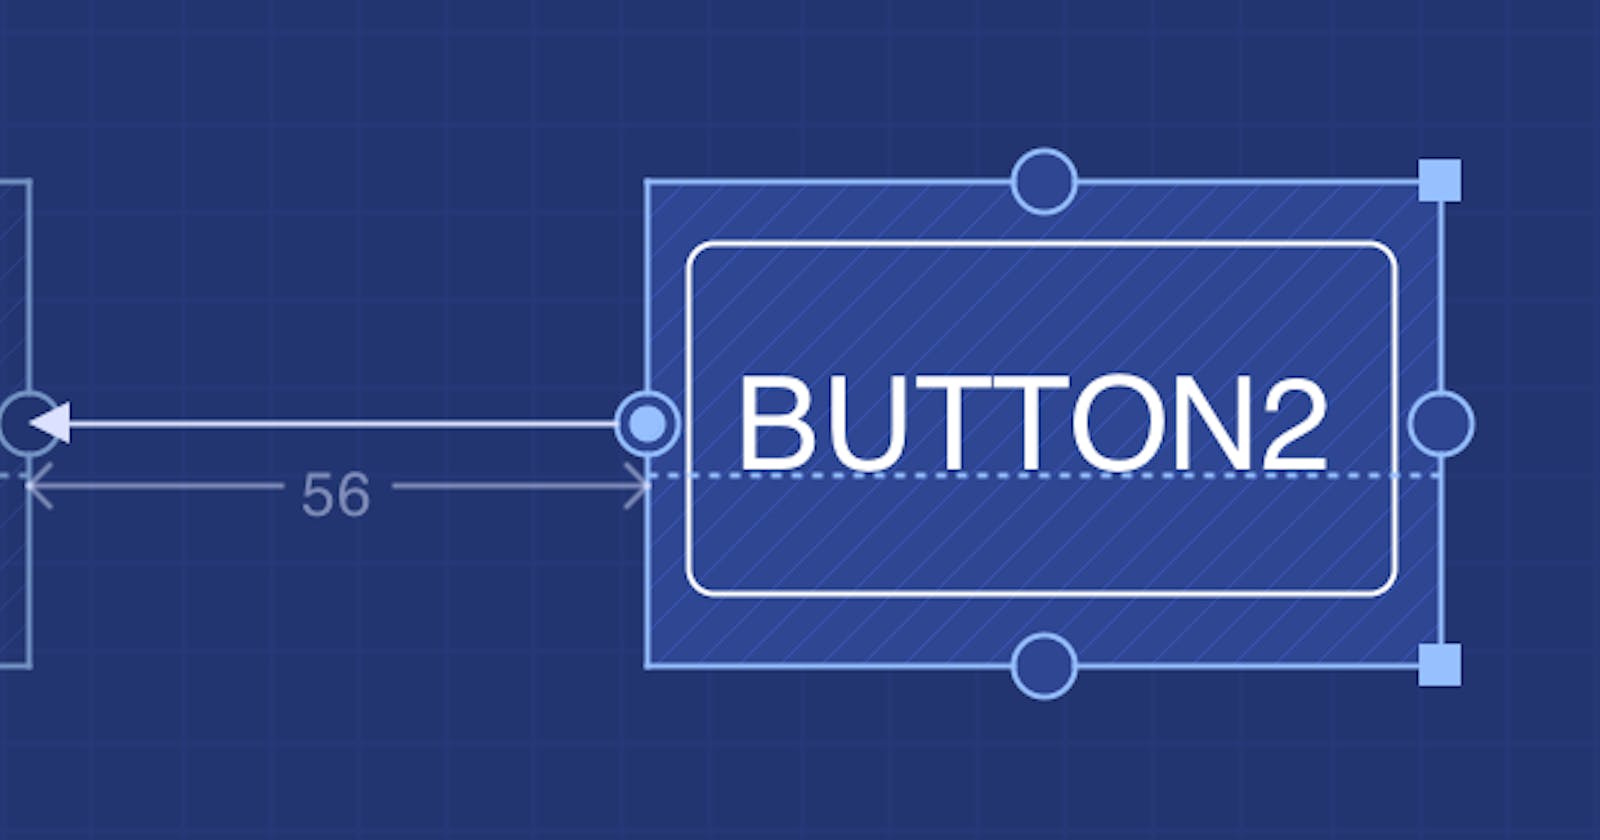
The Constraint Layout is meant to be used in conjunction with the Layout Editor tool from Android Studio. This is due to the complexity of these constraints parameters (there are no less than 26 these!). As such, learning the new Constraint Layout implies learning to use the Layout Editor as well. This in itself will probably constitute the biggest obstacle in the adoption of the new layout, as Android developers are not generally used to drag-and-drop layout editing, preferring to duke it out with the XML instead.
Compatibility
The library is supported back to API 9.
Example
Check out the song item layout XML. The full repository is available for your viewing pleasure here.
Walkthrough
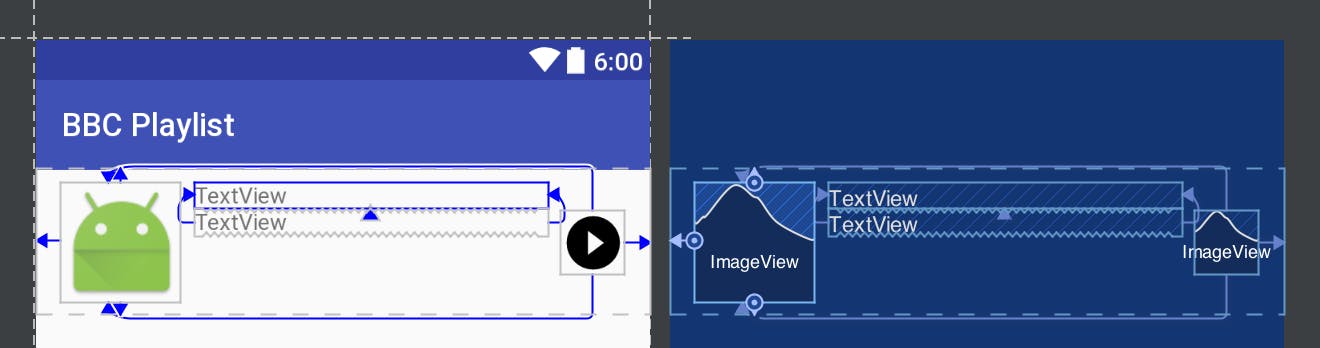
Let's walk through the creation of a typical list item layout:

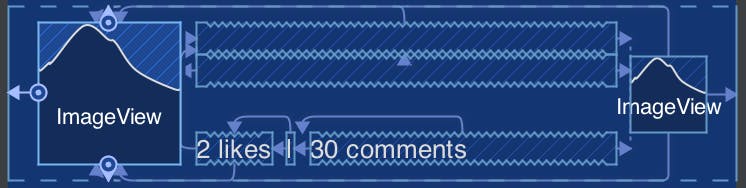
In the new blueprint view, that layout will look like this (first image has constraints turned off):

We start with an empty ConstraintLayout to which we add an ImageView. The simplest way to do this is to drag and drop an ImageView component onto the preview window. Now, drag and drop the constraints handles on the image view to the top, bottom and left edges of the view. This tells the layout manager that you want the view to match the top, bottom and left edges of the layout:

Notice that the Layout Designer assigned 16dp default margins and a size of wrap_content. Let's use the property editor to change those:

Next, let's add the second image view (the play sign), but this time let's align the right side to the layout's right side and the top and bottom of the first image view:
Using the properties pane, name the view and assign it a width and height of 40dp.
Now, let's add the title text view by dragging one TextView object into the preview area, in the general vicinity of where we want it to finally be. Then drag the left constraint handle to the right edge of the first image, the right constraint handle to the left of the second image and the top constraint handle to the top of the first image. Finally, name the field title and set the width to match_parent.
Repeat the above steps for the artist text view, but this time align the top of it to the bottom of the title and have the left and right edges align to the respective edge of the title. Set its width to match_parent.
The final step is to add the "social" row of text views. This could of course be done with a single text view, but for the purposes of demonstrating this layout, we're going to split this in 3 parts. Let's start by dragging 3 text views in the approximate locations where we want them. Set the fist and last to have a width of match_parent. Then, set the constraints as shown below.
Note: As you can see from the GIF, it becomes quite hard to know when to release the mouse button in order to create the desired constraint. Practice helps here, as does zooming in.

We're all set now from the point of view of the point of view of the layout mechanism. You should now change the parameters of the views to whatever you need, either in the visual properties editor or in the XML. I will include my copy of the XML below, but due to the nature of the layout editor, your results may be different, more often due to the order of the views and their parameters.
<?xml version="1.0" encoding="utf-8"?>
<android.support.constraint.ConstraintLayout xmlns:android="http://schemas.android.com/apk/res/android"
                                             xmlns:app="http://schemas.android.com/apk/res-auto"
                                             xmlns:tools="http://schemas.android.com/tools"
                                             android:orientation="vertical"
                                             android:layout_width="match_parent"
                                             android:layout_height="wrap_content">

    <ImageView
        app:srcCompat="@mipmap/ic_launcher"
        android:id="@+id/image"
        android:scaleType="fitStart"
        app:layout_constraintTop_toTopOf="parent"
        android:layout_marginStart="16dp"
        app:layout_constraintLeft_toLeftOf="parent"
        android:layout_marginTop="8dp"
        android:layout_width="75dp"
        android:layout_height="75dp"
        app:layout_constraintBottom_toBottomOf="parent"
        android:layout_marginBottom="8dp"/>

    <TextView
        android:layout_height="wrap_content"
        android:id="@+id/title"
        tools:text="Title"
        android:textStyle="bold"
        android:textColor="#000000"
        android:layout_width="0dp"
        app:layout_constraintRight_toLeftOf="@+id/play"
        android:layout_marginEnd="8dp"
        app:layout_constraintLeft_toLeftOf="@+id/artist"
        app:layout_constraintTop_toTopOf="@+id/image"/>

    <TextView
        tools:text="artist"
        android:layout_height="wrap_content"
        android:id="@+id/artist"
        android:textStyle="italic"
        app:layout_constraintRight_toLeftOf="@+id/play"
        android:layout_marginEnd="8dp"
        android:layout_marginStart="8dp"
        app:layout_constraintLeft_toRightOf="@+id/image"
        android:layout_width="0dp"
        app:layout_constraintTop_toBottomOf="@+id/title"/>

    <ImageView
        android:layout_width="40dp"
        android:layout_height="40dp"
        android:id="@+id/play"
        app:srcCompat="@drawable/ic_play_circle_filled_black_24dp"
        app:layout_constraintBottom_toBottomOf="@+id/image"
        android:layout_marginEnd="16dp"
        app:layout_constraintRight_toRightOf="parent"
        app:layout_constraintTop_toTopOf="@+id/image"/>

    <TextView
        android:text="2 likes"
        android:layout_width="0dp"
        android:layout_height="wrap_content"
        android:id="@+id/textView4"
        app:layout_constraintLeft_toLeftOf="@+id/title"
        app:layout_constraintBottom_toBottomOf="@+id/image"/>

    <TextView
        android:text="|"
        android:layout_width="wrap_content"
        android:layout_height="wrap_content"
        android:id="@+id/textView5"
        android:layout_marginStart="8dp"
        app:layout_constraintLeft_toRightOf="@+id/textView4"
        app:layout_constraintTop_toTopOf="@+id/textView4"/>

    <TextView
        android:text="30 comments"
        android:layout_width="0dp"
        android:layout_height="wrap_content"
        android:id="@+id/textView6"
        android:layout_marginStart="8dp"
        app:layout_constraintLeft_toRightOf="@+id/textView5"
        app:layout_constraintTop_toTopOf="@+id/textView5"
        app:layout_constraintRight_toLeftOf="@+id/play"
        android:layout_marginEnd="8dp"/>

</android.support.constraint.ConstraintLayout>
Advantages and disadvantages
Compared to other layouts (e.g. LinearLayout and RelativeLayout) the ConstraintLayout should be more efficient for very complex layouts, but creating the layout itself seems to require a bit more work.
Advantages:
Flat structure is faster to layout
XML is somewhat cleaner, consisting mostly of the views that hold the data
Blueprint viewer helps with understanding complex layouts that a developer sees for the first time.
Some previously complicated requirements are now easier to implement, for example:
Aligning two TextViews so that the baseline of their text matches
Aligning anything with the baseline of a
TextViewHaving a view partially overlap two other views (e.g. a FAB that sits only half way over the header image).
Disadvantages:
Steep learning curve
Dependency on the Layout Editor
At the time of this writing (Jan 2017), the Layout Editor has bugs, causing random constraints to disappear, or the preview window to be incorrect
uncertain if it will ever be fully adopted
requires a bit of effort to set up Jenkins to work with it. The solution I found for a previous project relied on the commands listed below (but note the contents of the file may or may not change with the versions of the library):
sh mkdir "$ANDROID_SDK/licenses" echo -e "\n8933bad161af4178b1185d1a37fbf41ea5269c55" > "$ANDROID_SDK/licenses/android-sdk-license"
Conclusion
The library has the potential to become very useful in the future, but in its current state, and due to the steep learning curve, I recommend not using it except in very complex layouts where speed of rendering is an issue (e.g. RecyclerView with many, potentially complex layout items - such as a Facebook-like app).